I see a lot of beautiful scarves in my second-hand shop travels. And I’ve owned some too. But the thing is… I never wear them. And neither do all the people who donate them I suppose.
But I DO wear these kimono tops. They are great for when you want to wear a singlet or a skinny strapped dress but still need to cover up your tuck shop arms 🙂
Also, they are really simple to make. Depending on the dimensions of your scarf, you can make a long, flowy kimono jacket, a shorter version that you tie at the front or a simple top, like this one.
You will need:
- square scarf that, when you fold it in half and hold it up to yourself, it will cover you from the shoulders to the waist
- sewing machine and thread
- scissors
- a side plate
- iron and ironing board
- Optional – I used an overlocker but you can just fold over and sew with a regular sewing machine
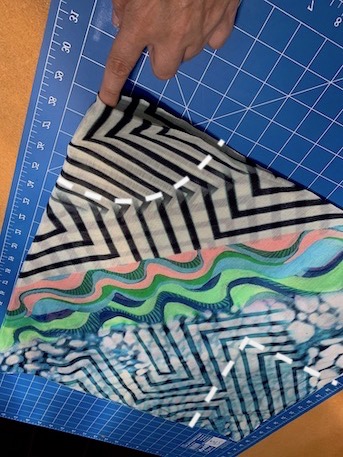
Step 1: Fold you scarf in half, then in half again. The point where all the folds meet will be the neck hole. The opposite corner will be cut out to create a sleeve. The dotted white line indicates where you will cut.
Step 2: Cut a rectangle from the the opposite corner. I’ve allowed myself a 20cm sleeve. I cut in about 15cm. Then unfold.
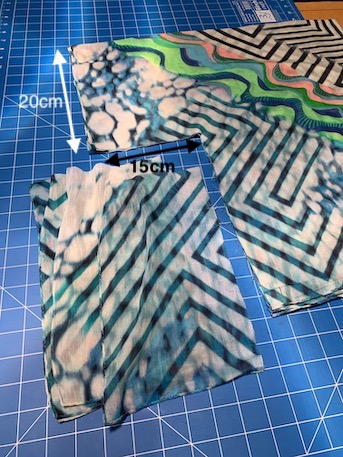
When it is unfolded it will look like this:
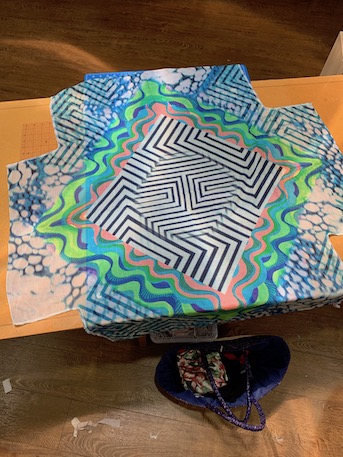
Step 3: Fold in half so you can see the shape of your final top.

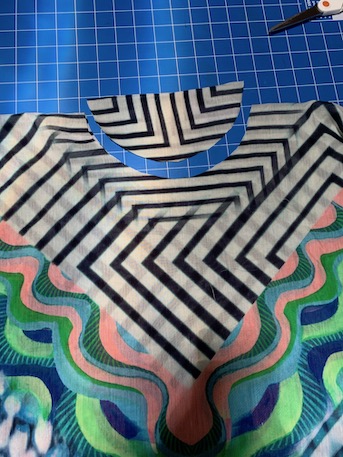
Step 4: Find something round (I used a side plate), position half the plate where you want the neck hole to be and trace.
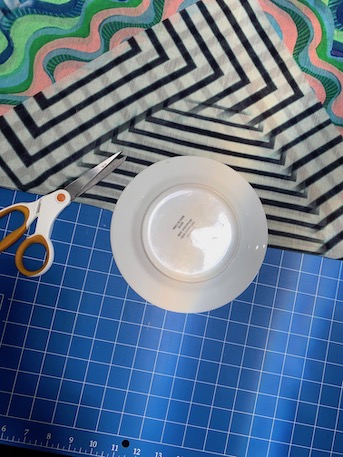
Step 5: Cut out the semi-circle you have traced for the neck hole.
Step 6: Turn your scarf top inside out so that the inside of the scarf is facing outward. (If your scarf is the same on both sides you can skip this step.) My scarf had a side that seemed brighter in colour.
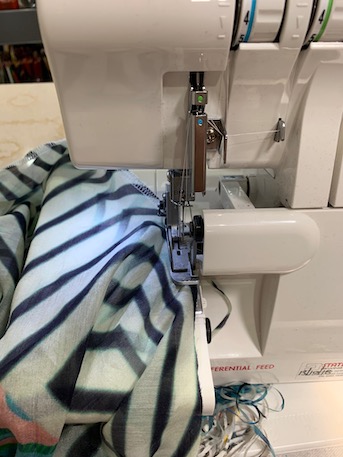
Step 7: Overlock all the raw edges. If you don’t have an overlocker, get one. (Just joking, but hey, investing in tools facilitates the creation of many things.) What I meant to say is, if you don’t have an overlocker just hem the raw edges.
Step 8: Sew the sides and bottom of the sleeves together.

Step 9: Carefully fold and sew around the neckline.
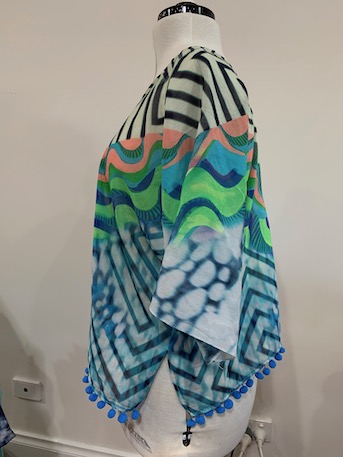
Step 10: Turn it right side out and you’ve got a top!

I thought my top could use a little somethin’ somethin’ to really deserve some jazz hands, so I added some pom pom trim around the bottom.
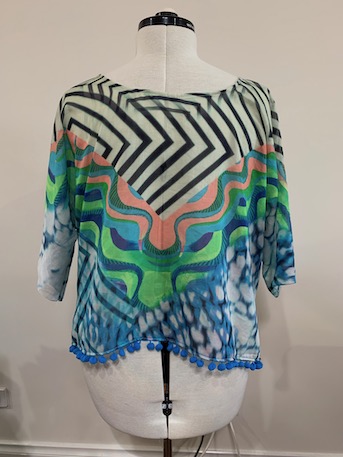
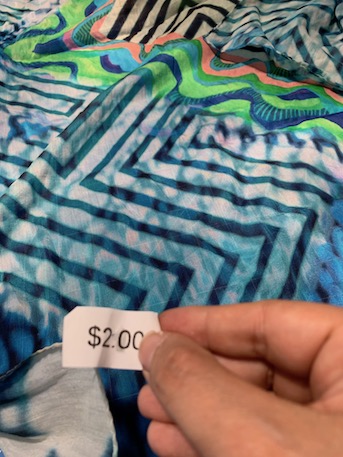
Check out this crazy bargain Camilla-esque kaftan top that I made for a total financial investment of $2.
Now that I look back I think this top could be a bit tricky around the neckline so I will do another tutorial with a simpler style.
Do you have a scarf you love but never wear? Maybe it’s waiting to be a top! Maybe some amazing fabric will catch your eye in the scarf section of the second-hand shop and you’ll take a closer look, knowing you could turn it into something else. Tell me about it if you do.
May The Power of Craft Be With You.

Re the neck, maybe you could use the unwanted bits that are cut off, to make a bias strip, or a facing.
LikeLiked by 1 person
Great idea!
LikeLike