Apparently, over 2 billion t-shirts are sold every year. Unfortunately, most t-shirts are not likely to last you a lifetime. So what can you do with them when they’re no longer a garment you want to wear?
Well, if you own scissors, and can tie a knot, then you can turn a t-shirt into a bag in about 10 minutes.
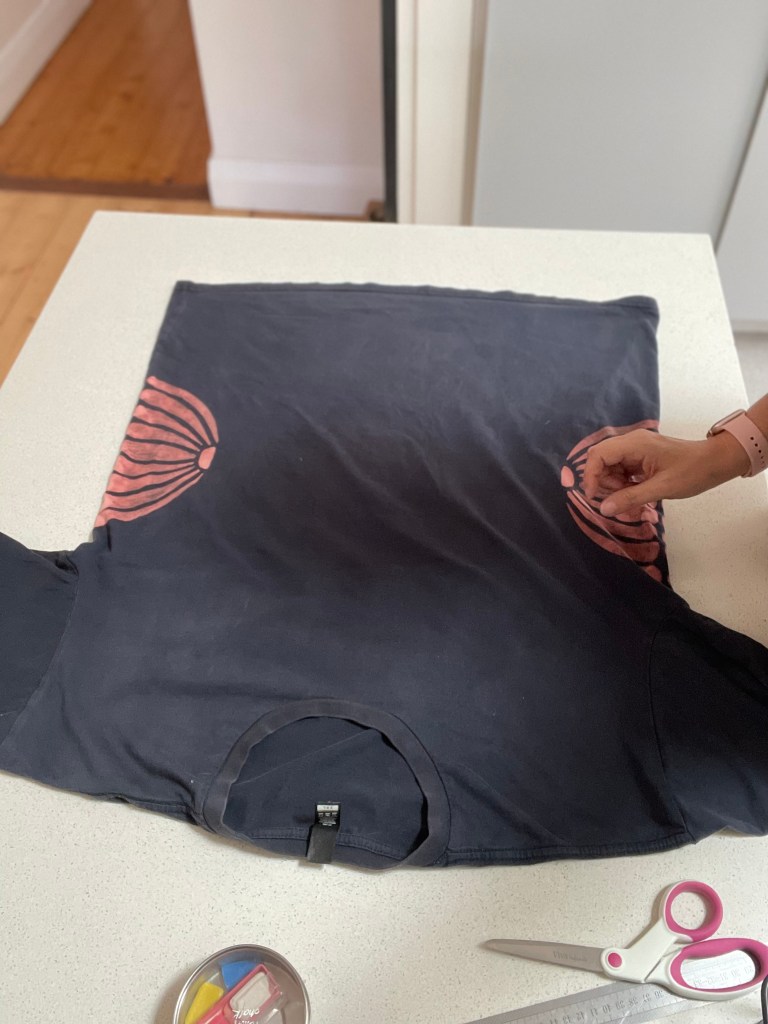
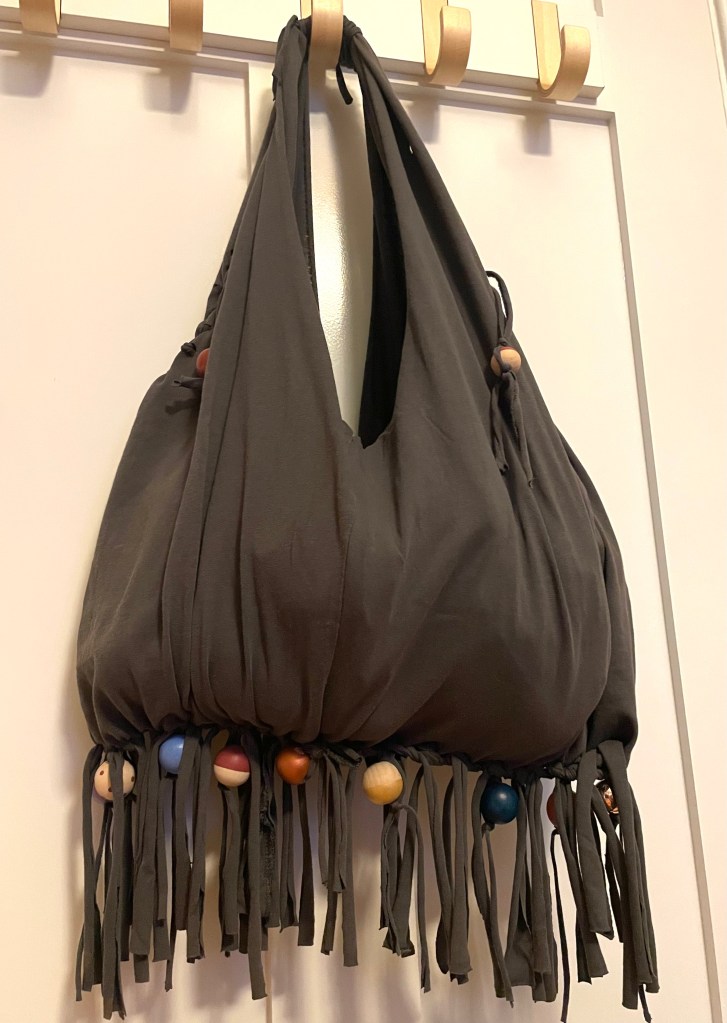
This one pictured below was one of my first attempts at painting with bleach on a plain black t-shirt (but that is a whole other tutorial!) You can creatively build on the basic idea of the t-shirt-to-tote as much as you want to.
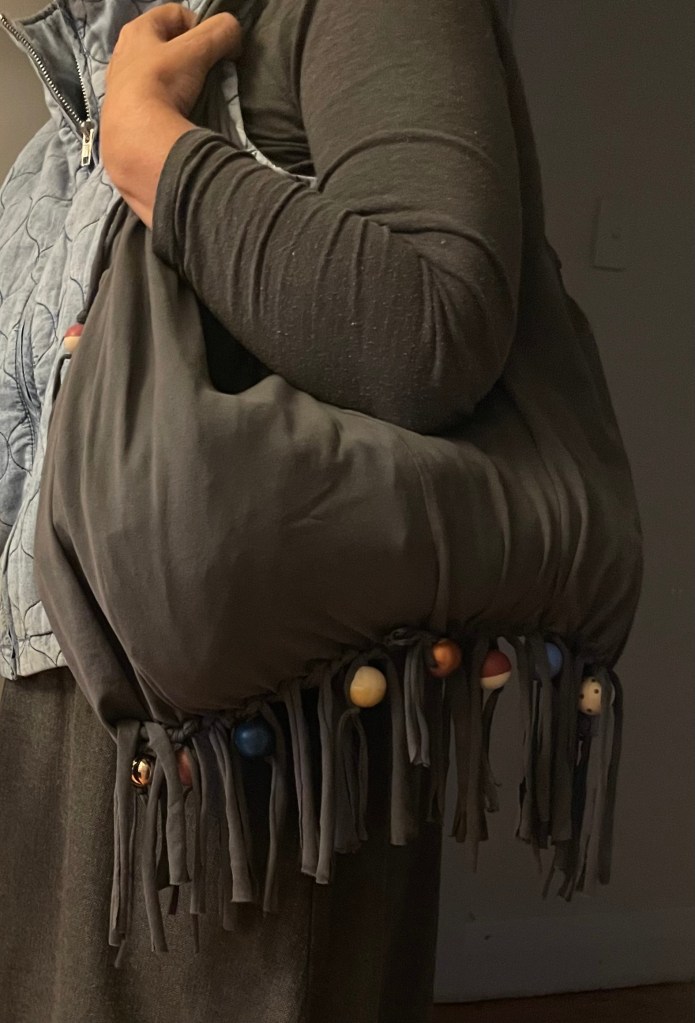
I have made quick and simple bags from t-shirts to take stuff to the op shop for donating and fancy, more complicated versions as ‘gift wrap’ for giving a present in reusable and useful packaging. They can make pretty good grocery bags for light-ish, bulky things like bread and cereal boxes, or use it for your towel and your book when you head to the beach.
Where to source t-shirts
- Your own cupboard!
- Friends, family
- Clothes swaps
- charity / op shops
The Uniting Church op shop in Brunswick, Victoria, has been holding By-the-Kilo rummage sales on Saturdays lately and they are a brilliant place to pick up a literal kilo of bargains for $6. This is a great initiative for keeping stuff on-shore (not shipping our waste problem elsewhere), providing affordable clothing for those who need it, and materials for crafters and upcyclers.
Step by step to turn a t-shirt into a tote bag
Watch this video and/or follow the written steps below.
- Step 1: Lay your t-shirt on a flat surface and cut the neck binding, bottom hem, and the sleeves off. It’s best to do this with the shirt inside-out so you make sure you cut out all the stitching. Cut a bit deeper than the original neck line.
- Decision point: Do you want your t-shirt design to be at the front of your bag (good for showing off the graphics); then skip step 2; or do you want your bag to fit more naturally over your arm? Go to step 2.
- Step 2: Pick your t-shirt up by the armholes, match up the side seams so they are now in the middle and the armholes are on top of each other. Smooth out so there are no lumps.
- Step 3: Measure 15cm up from the bottom hem and draw a line. (If you are working inside out, use any pen or pencil, or you can just iron a line as a guide.) Measure intervals of 1.5 cm and cut up from the hem to the 15cm line. You will end up with strips (or fringing) along the bottom of your t-shirt.
- Decision point: Do you want your final bag to have fringing dangling from the bottom or do you want a more streamlined look? If you don’t want fringing showing, make sure your t-shirt is turned inside-out before going to the next step.
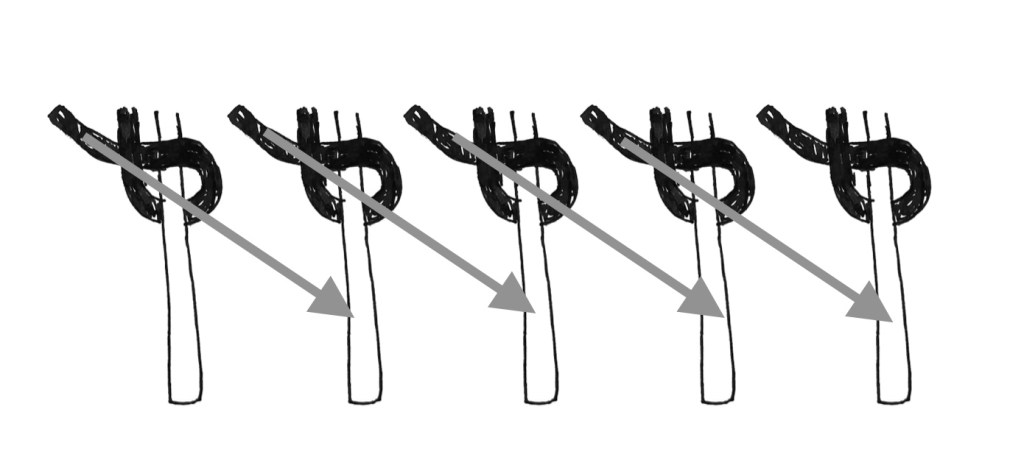
- Step 4: Tie the strip from the front of your t-shirt to the strip from the back of your t-shirt in a single knot. Repeat until all the knots are tied.
- Step 5: Tie the top strip of the first knot to the bottom strip of the second knot – see diagram below. Repeat until all the knots are tied. Pull the knots tight.
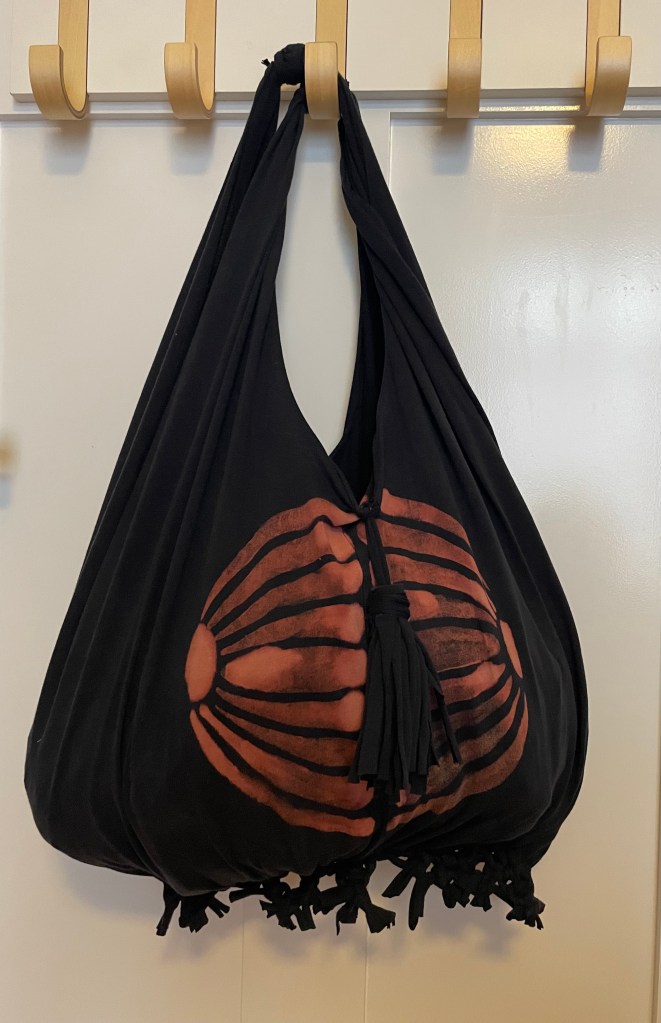
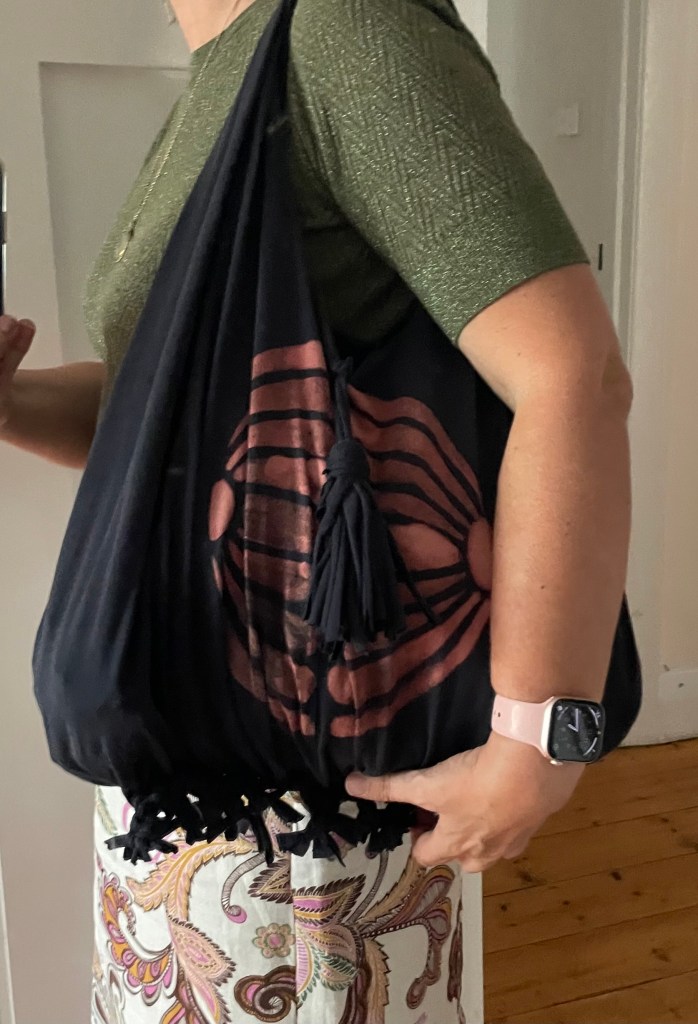
You have a bag! Want to make it a bit more special?
Go Fancy
Add some handle bindings
This will make your handles look more like handles and provide some additional strength. Watch this video and/or follow the written steps below.
- Step 1: Cut a small strip from the neck binding you chopped off earlier, just big enough to go around the shoulder seam.
- Step 2: Cut a 1.5cm strip along the longest edge of the sleeve you chopped off earlier. Pull the strip taught to create a t-shirt string.
- Step 3: Wind the t-shirt string around the neck binding section then tie it in place.
Add a decorative tassel/s
For this step you will need some PVA glue. You can flip this tassel across the bag opening to hold the opening lightly closed, or just leave it decoratively dangling! Watch the video and/or follow the written steps below.
- Step 1: From the sleeve you cut off earlier, cut a rectangle that includes the hem. Make it as big as you like/as the material allows, but a minimum size would be 15cm wide x 10cm deep.
- Step 2: Cut 2 x 1cm strips from the long edge and set aside. Then cut 1cm strips up to (but not through) the hem of the former sleeve. Pull all the strips tight.
- Step 3: Spread a thin layer of glue along the hem section of your rectangle.
- Step 4: Fold one of the two long strips you cut off earlier in half and place it, with the folded part above the top of your fabric, at the top edge.
- Step 5: Roll the rectangle into a cylinder, making sure you enclose the folded strip in the centre of the roll.
- Step 6: Take the second of your long strips, wind it around the hem section and tie it securely. You have a tassel!
- Step 7: To fix it to your bag, cut a small hole near the top middle edge of your bag and loop the tassel through this hole. If you want to you can use the other sleeve to make a second tassel for the other side of your bag.
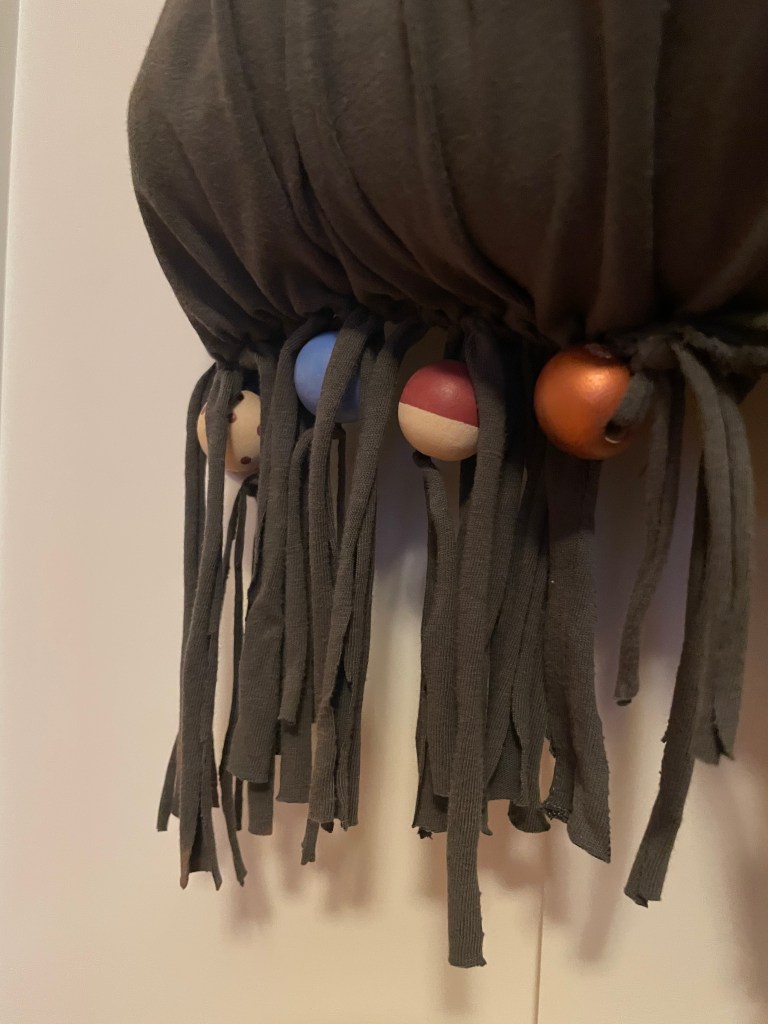
Add some beads
For this step you will need to have chosen to have your fringing showing on the outside of your bag. If you decide you want this look from the beginning you can choose to make your strips longer (say 25cm, or as long as your t-shirt allows, whilst still allowing for some bag room!) You simply thread on your beads and tie them in position. If your tassels are too think to go through the bead hole, cut it in half and use the other half to secure it in place.
If you give it a go send me a pic in the comments!
